eCloud User Configuration (Office/Commercial Use)
Adding a New User (Office/Commercial Use)
Adding a User
- Navigate to the "People" tab
- Select "New"
- Select users department (These can be created in the "Department" tab)
- Always select "Personnel"
- Enter first and last name of user
- Enter the user's ID (*This must be custom to each user but can be any number you would like it to be*)
- Enter users email, region, and phone number
- Select "Next"
- Enter PIN and/or RF Card (*one is required*)
- Facial ID data can be added in the application or an image of the user can be uploaded (*it is suggested that the picture is taken against a light colored background Ex. white wall*)
- Select the access level for the user
- Select "Submit"
- The changes will now be active (within 60 seconds)
Removing a User
- Navigate to the "People" tab
- Select the trash can next to the user
- Select "OK"
- The changes will now be active (within 60 seconds)
Creating Access Groups
- Navigate to the "Access Group" tab
- Select "New"
- Name access group
- Choose frequency of access group
- Choose start and end times for allowed access
- Select the doors the group will have access to
- Select "Submit"
Editing an Existing Access Group
- Navigate to the "Access Group" tab
- Select eye icon to the right of the access group
- Select "Edit"
- You can now edit the access time and allowed doors in the access group
- The changes will now be active (within 60 seconds)
Editing Bulk Users on an Existing Access Group
Adding Users to an Access Group
- Navigate to the "Access Group" tab
- Select eye icon to the right of the access group
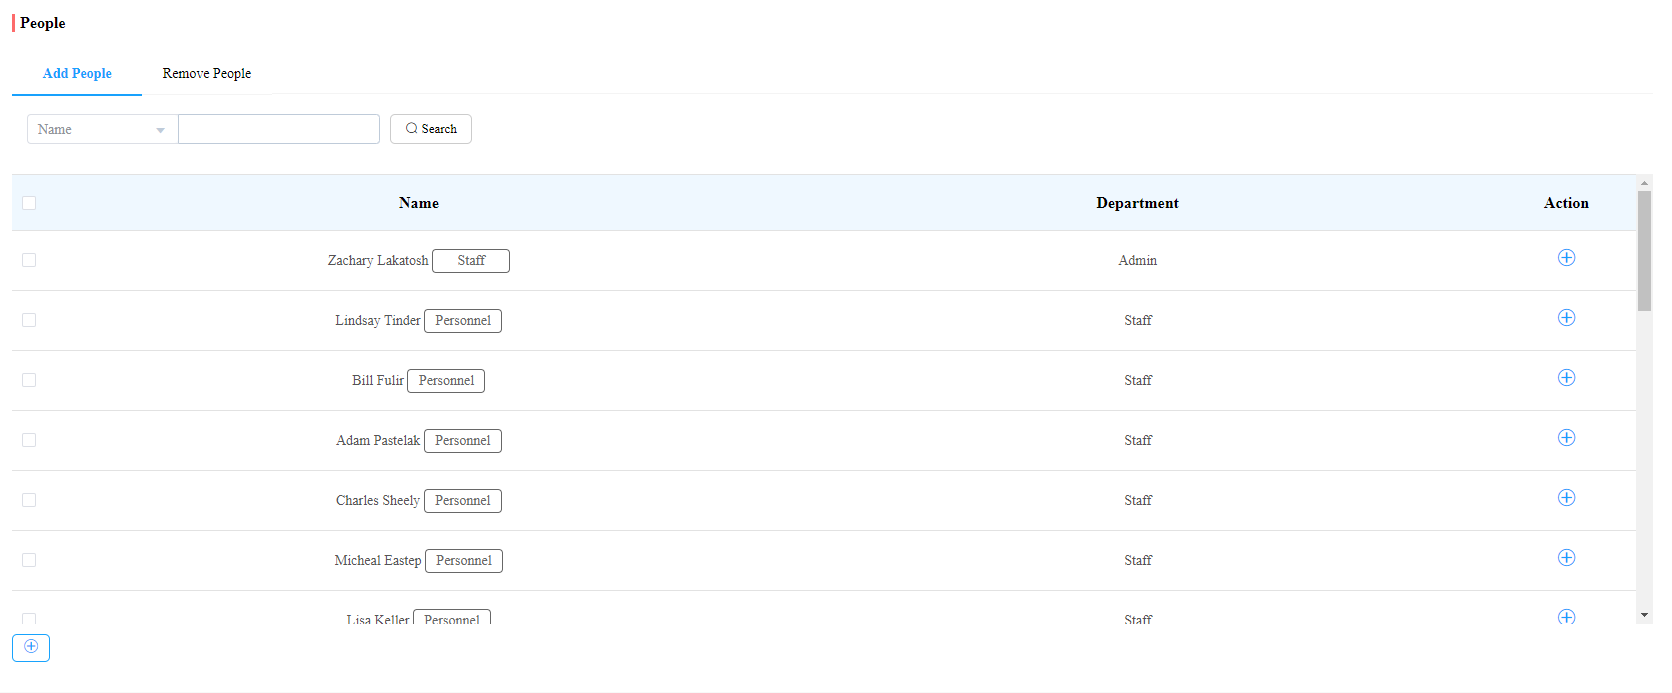
- Select users you would like to add and select the plus icon in the bottom left
- The changes will now be active (within 60 seconds)
Removing Users From an Access Group
- Navigate to the "Access Group" tab
- Select eye icon to the right of the access group
- Select users you would like to remove and select the minus icon in the bottom left
- The changes will now be active (within 60 seconds)